Tuesday, October 4, 2011
Coconut Cream Pie - To Die For!
COCONUT CREAM PIE
PASTRY
1 1/2 c. unsifted all-purpose flour
1 to 1 1/2 T. granulated sugar
1/2 t. salt
6 T. cold or frozen butter, cut up
3 T. cold shortnening, or canola oil ( I used oil)
1 large egg yolk
2 t. lemon juice, or white vinegar
3 to 4 T. ice water, or as needed (because of the oil, I only used 2)
FILLING
2/3 granulated sugar
1/4 c. cornstarch
1/4 t. salt
2 1/2 c. milk
1/4 c. heavy cream
2 large egg yolks, at room temperature
2 t. vanilla extract
2 T. butter, at room temperature
1 1/2 c. shredded coconut
WHIPPED CREAM TOPPING
1 c. heavy cream, chilled
2 T. powdered sugar
1/2 c. toasted coconut
Okay, let's get started by putting together the crust. Combine the dry ingredients (flour, salt, sugar) in a large bowl and whisk to blend. Add the cut-up chilled fats/oils. Working quickly and lightly, pinch and slide lumps of dough between your fingertips until the mixture resembles dry rice. This process layers the shortening and flour together, creating "leaves" that will form flakes when baked. If you use the oil like I did you may find it will be a bit lumpy but that's okay, don't overwork things, just get rid of big butter lumps. Add the yolk, lemon juice or vinegar, and the minimum amount of iced water. I only needed 2 tablespoons. Toss lightly, just until it clumps together. The dough should not be sticky, but clumps easily. The oil helped with that. Now form a flat 6 inch disk, wrap with plastic wrap or waxed paper and chill for at least 30 minutes. When ready to roll out and bake, preheat the oven to 425 degrees. Roll out dough on lightly floured surface, I used the wrap to roll it out on. Be sure to flour the wrap though as the dough will stick to the plastic or paper if you use the oil. Fold in half and place in pan, opening and tucking into pie pan without stretching it. Crimp edges. Chill again then blind bake by lining the crust with foil and filling it 2/3 with dry rice or beans. Bake at 425 for 15 minutes then remove liner and rice or beans and turn oven down to 350 and bake for another 10 to 15 minutes. Cool before filling.
To make the filling combine the sugar, cornstarch, and salt in a heavy-bottomed saucepan. In a bowl, whisk the milk and cream into the egg yolks. Whisk the egg-milk mixture into the cornstarch-sugar in the pan. Whisk well to be sure all the cornstarch is picked up off the bottom of the pan and dissolved.
Set pan over medium heat and cook the mixture for about 12 minutes, until thickened and brought to a boil. Stir on and off with a wooden spoon for the first 5 minutes, then stir constantly for abot 7 minutes longer, until the mixture really thickens and reaches a boil and you see fat heavy bubbles work up to the surface and burst. Use the whisk instead of the spoon occasionally to remove lumps. Boil for 1 full minutes while stirring constantly. Remove from the heat and add the butter and vanilla. Stir in the coconut and spoon into the cooled pastry shell. Cover with plastic wrap to keep from forming a skin and refrigerate until just before ready to serve. In a cool bowl whip the one cup of cream, the powdered sugar and vanilla until stiff peaks form. Spoon over chilled pie and sprinkle toasted coconut over the top. This is the BEST coconut cream pie I've ever tried, bar none. I hope you enjoy this as much as we did!
Monday, October 3, 2011
Monday Message of Hope
We thank thee O God for a prophet
to guide us in these latter days.
We thank thee for sending the gospel
to lighten our minds with it's rays!
We thank thee for every blessing
bestowed by thy bounteous hand.
We feel it a pleasure to serve thee,
and love to obey thy command.
I woke up this morning with this hymn running through my head, a wonderful way to start off the week. We celebrated our Autumn General Conference of the Church of Jesus Christ of Latter-day Saints, and were blessed to be spiritually fed by men and women of courage and fortitude, faith and love. So I share in part, the message of hope, that He lives and is real and loves us. May we all have a song in our hearts today!
Tuesday, September 27, 2011
Upcycled Treat or Cake Plate
So I found a candle stick and adhered it to the bottom of the plate with epoxy, and whaalaa! A treat, or cake or cupcake plate! I know it looks crooked in the photo, but that's the doily and not the plate. :-) I took this before I dashed out of our apartment this morning. I drove up from Utah to Oregon to ready the house for winter so I was in a hurry. Anyhew......
Think of the possibilities! A little taller brass candlestick, paired with a vintage china plate, or a short milk glass vase, paired with a royal ruby or forest green plate, there's so much that you can do with this idea!
Thursday, September 22, 2011
The Colors of Autumn....Jewelry
I find that each season brings with it a palette of colors that often fit the mood I'm in. I find clothing, home decor, make-up and even jewelry that seems to be just perfect for that particular year. I went shopping yesterday and found some beads that caught my eye, not really for any reason but that they're pretty and I wanted them. When I sat down to play around with my new treasures, I realized that some of the beads would match my old and favorite shirt! This necklace and the matching earrings are simple, but perfect for a semi-casual top that is suitable for a walk in the woods, or going out for fish and chips with hubby. What I would love to do, and perhaps you may be interested, is to help create jewelry that goes with a new or old favorite outfit you have. We can go fancy, or simply, whatever you desire. I will be posting pieces at my etsy shop for fall, so if you see something you would like in colors that would match a particular ensemble, or you find a photo of a design you like, let's work together to create a one of a kind piece or set for you. Just drop me a line and we can talk.!
Friday, September 16, 2011
Foodie Friday - No Knead, Dutch Oven Bread
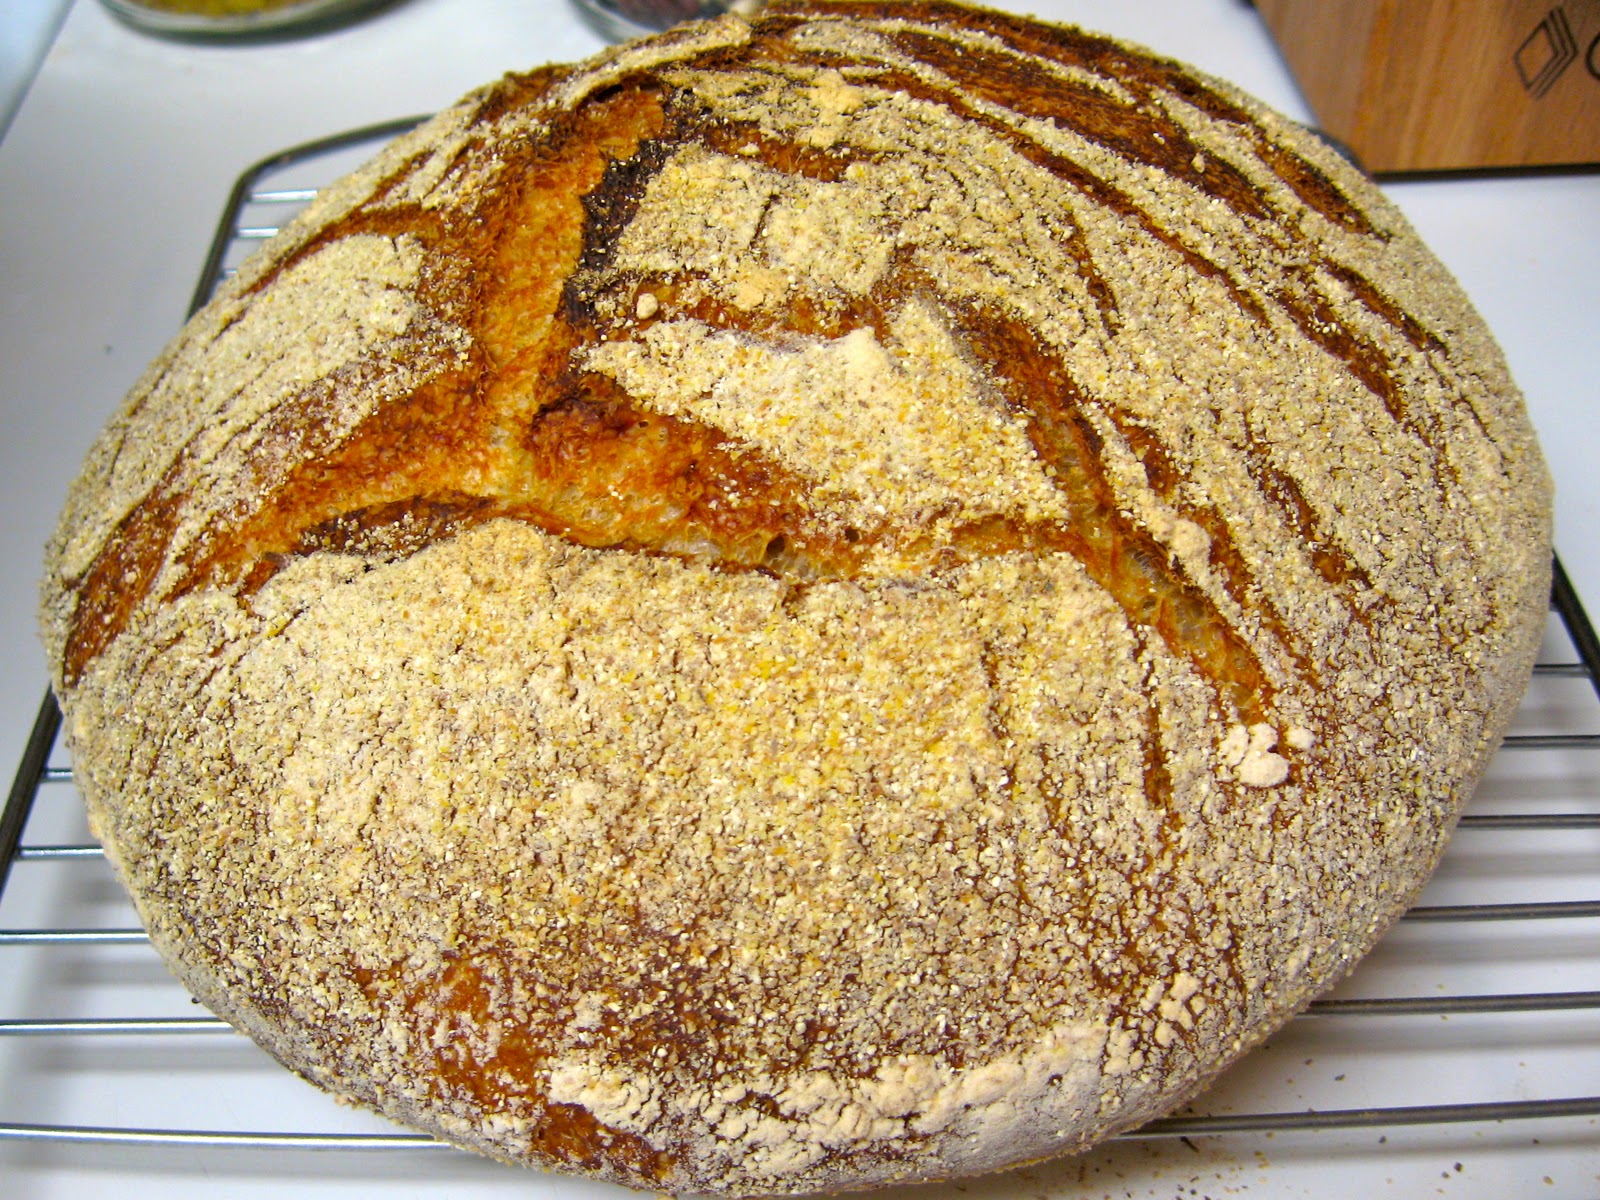
"Without bread, everyone's an orphan" is an Italian phrase any foodie should live by! Okay, that's if you aren't allergic to wheat...:-). I pooh pooh anyone who tries to say you should never eat bread though. What good is a bowl of hot steaming soup on a cold Autumn day without a nice hunk of crusty bread to sop up the juices with?! I wish I could take credit for this recipe, but I got it out of the Mother Earth News - Guide to Fresh Food All Year. An article by Roger Doiron shares his love of bread and a search for bread like he found in Europe. This loaf is easy to make although it does take time. It's well worth it though as it has that chewy crust and soft fine texture on the inside that you love in a good bread for soups and such. It makes a wonderful french toast as well, and the nice thing is that there's no fat or sugar and it uses very little yeast, as well as no requirement to knead the dough. I have to say that my bread came out just like the photo in the article and Kent loved this, so we will be having this again.
NO KNEAD, DUTCH OVEN BREAD
1/4 t. yeast
1 1/2 c. warm water
3 c. all purpose flour, wheat flour or a combination of. I used 2 cups white to one whole wheat
1/4 c. flaxseed meal
1 1/2 t. salt
In a large bowl dissolve yeast in the warm water. Add the salt and flour and blend well. The dough will be shaggy and sticky. If it's too dry add a tablespoon or two more warm water. Cover the bowl with plastic wrap if you have it and let the dough rest in a warm place for at least 8 but up to 12 to 18 hours. I started mine in the evening so I could finish it up the next day.
The dough is ready when the surface is dotted with bubbles. With a rubber spatula scrape the dough away from the sides of the bowl, and turn it in the bowl to make a ball. Take parchment paper, and tear off a square about 12"X12". Somewhat generously sprinkle with flour and place the dough on it. Sprinkle the dough with a little flour and fold the dough over on itself once or twice. Cover with inverted bowl and let it rest for about 15 minutes.
Using just enough flour to keep the dough from sticking to the paper or your fingers, gently shape it into a ball. Cover with the inverted bowl and let rise for about 1 to 2 hours. When it's ready, the dough will have doubled in size and will not readily spring back when poked with a finger.
About 30 minutes before the dough is ready, heat your oven to 475 degrees. Put a 6-8 quart heavy covered pot (cast iron, or enamel) in the oven as it heats. When the dough is ready, carefully remove the pot from the oven and lift off the lid. Grab two corners of the parchment paper with the dough on it and set it into the pot. Yes, you bake the bread on the parchment paper in the dutch oven. Cover and bake for 30 minutes, then remove the lid and bake another 15 to 20 minutes until the loaf is beautifully browned. Remove the bread from the Dutch oven and let it cool on a rack for at least 1 hour before slicing. Enjoy!
Thursday, September 15, 2011
Spicy Zucchini Relish
Here's my version of
Spicy Zucchini Relish
6 c. each finely chopped zucchini and cucumbers
4 c. each finely chopped onion and bell peppers, including half red peppers and a couple of hot jalepenos
Place all veggies in an enamelware or stainless steel pan or glass bowl. Sprinkle with 5 tablespoons of canning/pickling salt. Mix well. Cover and let sit over night, for about 8 hours and rinse.
Sterilize 6 pint or 12 half pint jars and sets of lids for all.
In a large pot combine:
4 cups white sugar
2 cups brown sugar
2 1/2 cups cider vinegar
1 T. curry powder
1/2 t. nutmeg
1 1/2 T. celery seed
1 T. dry mustard powder
Add rinsed vegetables and bring to a boil. Turn down to a slow boil and cook for about 30 minutes, stirring occasionally. Ladle into hot jars, straining a little of the syrup off if needed so relish is not soupy. Put lids on firmly and hot water bath for about 10 minutes. As an aside, many of the recipes called for 1-2 tablespoons of cornstarch, but if the veggies are drained well before cooking, the sugar and vinegar mixture should be the perfect consistency when cool.
Tuesday, September 13, 2011
Tasty Tuesday - Apple Galette for Two
The filling consists of 2 generous cups of thin apple slices, 1/4 cup chopped walnuts, 1 tablespoon lemon juice, 3-4 tablespoons of brown sugar, 1/4 teaspoon apple pie spice and 1/4 teaspoon nutmeg, 1 heaping tablespoon flour. Gather for later, apple jelly or apricot preserves, ( I used this) and 3 tablespoons graham cracker or plain bread crumbs.
Combine fruit, sugar, seasonings, nuts and flour and stir well. Now take out your disk of dough and roll it out into a 10 inch circle on your buttered foil with a floured rolling pin.
Now you are ready to put this together. Whisk a tablespoon of water into an egg, and brush over dough. Now take 1/3 cup jelly or preserves and spread over that. Then sprinkle your crumbs over that and pour filling on top of that, mounding it to stay within an 8 inch area.
Gently lift the crust edges to fold over the outside of the apple filling. Pinch cracks together and brush crust with egg wash. Sprinkle with a dusting of sugar over the whole thing. Slide the Galette, foil and all, onto a cookie sheet and bake on a lower rack in a preheated oven at 425 degrees for 15 minutes, then lower the temperature to 350 degrees and bake for another 25 to 30 minutes, until the apples are done and the crust is golden brown.
Brush a bit of fruit jelly or preserves over fruit to give it a nice shine.
Whalaa! Apple Galette for Two! Serve with warm vanilla ice cream or whipped cream. Soooo yummy Kent wants this for breakfast tomorrow. Enjoy!
Apple Galette for Two
CRUST
1 cup flour
5 T. cold butter
2 T. sugar
1/2 t. salt
FILLING
2 c. thinly sliced apples
1/4 c. chopped walnuts
3 T. brown sugar
1/4 t. each apple pie spice and nutmeg
1 T. lemon juice
1 egg whisked with 1 T. water
1/2 cup apple jelly or apricot preserves
3 T. graham cracker or plain bread crumbs