Showing posts with label chocolate. Show all posts

Sunday, October 14, 2018

Chocolate Covered Cherries

It's almost that time of year again, when the store shelves are covered with boxes of all sorts of sweet delights. As a young child chocolate covered cherries always caught my eye, and was one of my favorite treats, even for my birthday.

I stumbled across a small pamphlet of chocolate treats from Nestle that I picked up waaaay back in 1982 and still have. The rest of the recipes I may get to some day, but I've never tried them, because my family loves these so much. It's time to share this recipe with you.

Chocolate Covered Cherries
60 maraschino cherries with stems (are about 30 cherries in a 10-ounce jar)
3 tablespoons butter, softened
3 tablespoons light corn syrup
1/2 tsp salt
1/2 tsp. vanilla
2 1/2 cups sifted confectioners' sugar
1 cup each milk chocolate chips and semi-sweet chocolate chips
3 T. vegetable shortening

Drain cherries thoroughly on sheets of paper toweling (several hours or preferably overnight). In a small bowl, combine softened butter and corn syrup. Stir in sifted confectioners' sugar, salt, vanilla. Sometimes I add just a touch of the marachino cherry juice as well. Knead mixture until smooth. If mixture is too soft to handle, put it in the refrigerator to chill well. On a surface dusted with confectioners sugar roll out dough to about 1/8 inch thick with a small round cutter, about 1" in diameter, cut the dough into circles. Shape around each cherry. Place the coated cherries upright on a baking sheet lined with waxed paper or parchment paper. Chill until firm. Melt chocolate and shortening in a double boiler over low heat. Holding cherries by the stem, dip one at a time into the chocolate. Spoon chocolate over the cherries to coat. Be sure to completely seal the cherries, otherwise the cherry juice may leak out after the chocolate has set. Let excess chocolate drip off cherries. Place the dipped cherries stem side up on a baking sheet lined with waxed paper. Chill until chocolate is firm. I sometimes double dip. Don't skip the shortening, it makes the chocolate smooth and keeps it from "blooming" when hardened. Enjoy!


Tuesday, December 11, 2012

Almond Fudge Bars on a Tasty Tuesday


Another holiday tradition around our home is to have Almond Fudge Bars, and their counterpart Butterscotch Bars. Originally a recipe created by and using Bisquick Baking Mix,  I adapted the recipe so I could use ingredients we always have on hand. These go fast, so be sure to have plenty baking supplies around.

Almond Fudge Bars
Preheat oven to 350 degrees
1 cup real butter
2 1/2 cups flour
2 cups brown sugar
3 cups rolled oats
2 eggs
1 tsp each vanilla and almond extract
1 tsp baking soda
1/2 tsp salt

Fudge filling
1 12oz. bag semi-sweet chocolate chips
1 cup sweetened condensed milk
2 T butter
1/4 tsp salt
1/2 cup toasted almond slices

For the dough, a large bowl cream butter, brown sugar, eggs, vanilla and almond extracts. Sift together flour, baking soda and salt, mix in to creamed mixture. Add oats and stir in well.  In a 15 x 10 inch cookie sheet press 2/3rds of the dough to cover the whole pan. Buttering your fingers helps with this.
Over a double boiler slowly melt chocolate chips in the sweetened condensed milk,  along with 2 T. butter and add salt.  Spread over the dough in cookie sheet. By teaspoonfuls drop the rest of the dough on the chocolate layer. Sprinkle almonds over that and press in to dough. Bake for 20 to 25 minutes. After slightly cooled cut into 48 squares. When completely cool store in airtight container. Enjoy!


Monday, December 10, 2012

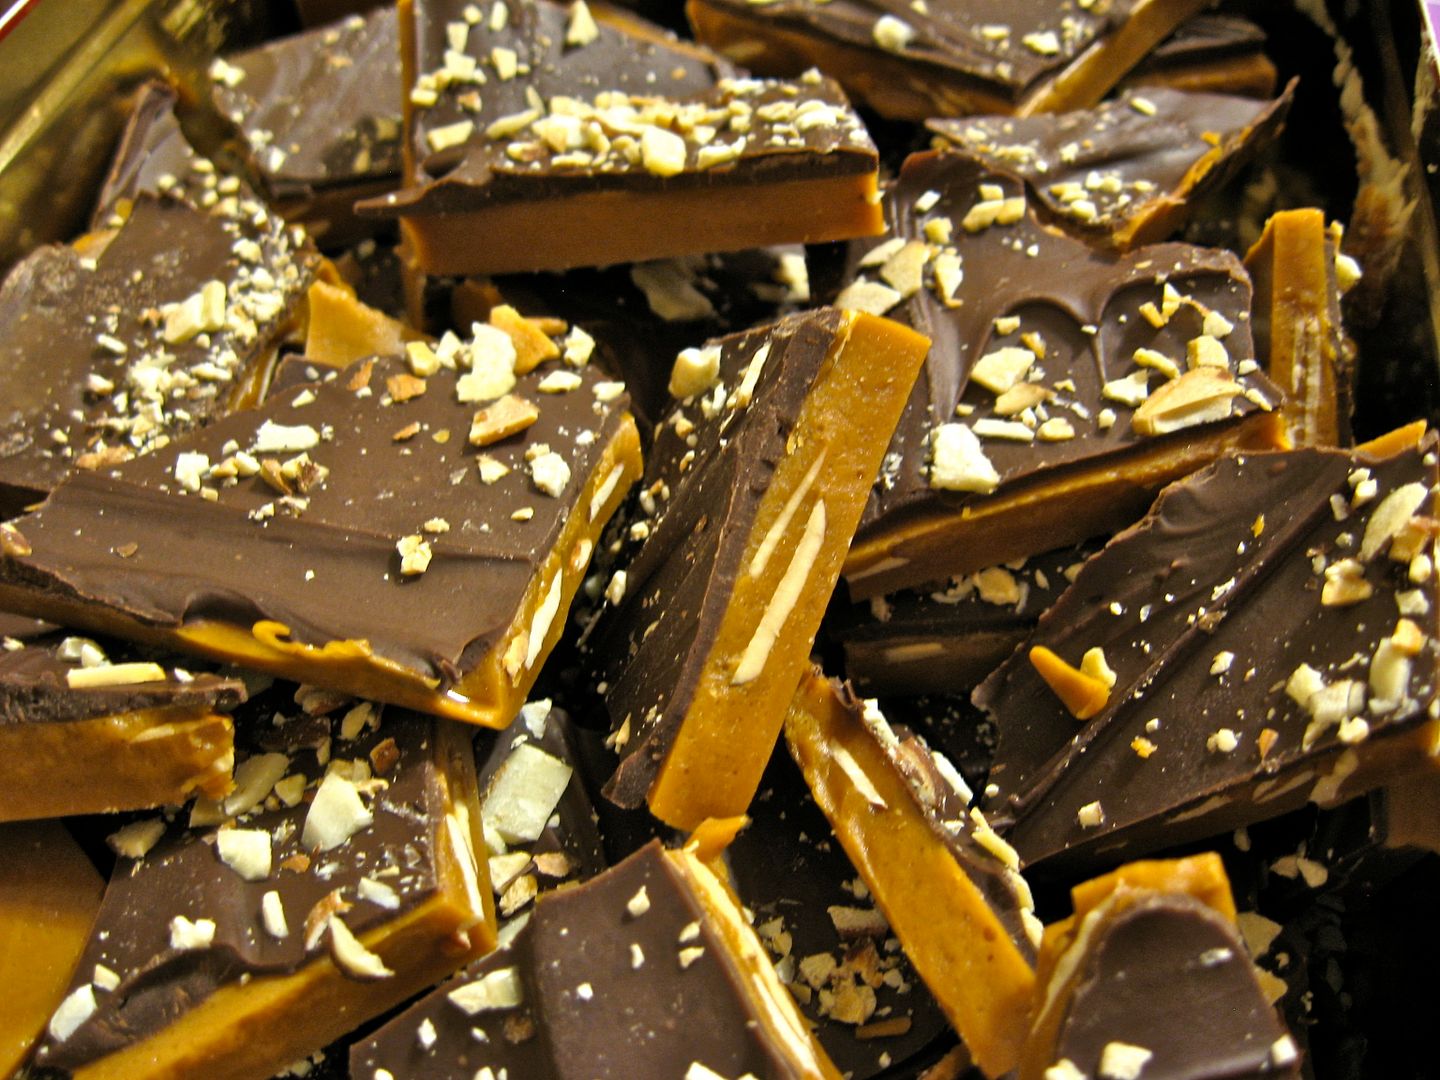
Homemade English Toffee a Christmas Tradition


Toasted almonds in a buttery sweet, melt in your mouth toffee, slathered in luscious chocolate with more toasted almond bits. Heavenly treats your family will love. My mother started making toffee when I was 13, and it became a tradition. I started the same tradition when I was raising my own children, so they would have a bit of the grandmother they never knew. Here's our version, easy and delicious. No water, no corn syrup, I like this recipe the best as it is.

English Toffee

1 cup real butter
1 1/2 cup sugar
1/2 cup toasted almond slivers
1/2 cup each semi-sweet and milk chocolate chips

In a heavy duty pot, melt butter and add sugar. Over medium heat, or a little lower depending on your stove, continue to cook, stirring constantly with a back and forth motion over all the pan bottom to keep from scorching. Using a candy thermometer bring toffee to 290 degrees. Before you get to that temperature you might find there is a separation stage, where it looks as if there's a layer of oil that separated from the carmelized sugar. Keep stirring and it will go back in to the toffee mixture. Do not pour it off, you will ruin your toffee.  ( I test by dropping a drizzle into a cup of cold water and tasting it. You want a smooth texture, not grainy. I have learned to eyeball this over the years as there's a point where you get just past the grainy texture, but before it gets too brown. You want a nice golden brown. )  Add nuts, stir in and pour onto cookie sheet. This will make the pan very hot so you want to put the cookie sheet on a cooling rack. You do not need to butter the sheet as some recipes suggest, as it makes the toffee too greasy. After about 5 minutes, sprinkle the chocolate chips on the hot toffee. Let it sit for a few minutes and then using a spatula spread the melted chocolate over the toffee. You can sprinkle it with more toasted almond bits if you like, we do. :-) If you have any questions drop me an email. I hope you get a chance to try this!

Sunday, March 18, 2012

Breakfast by Candlelight

A power outage created an opportunity for breakfast by candlelight! The lights went out about 8 last night, and were still out when we woke up this morning. Sooooo we decided to pull out the peanut butter and bread, and low and behold there was a box of chocolate bars Kent picked up at Costco. Along with some yummy Clementines we had a marvelous breakfast. The real kicker was that the lights came on in the middle of the feast so I nuked the bread with chocolate and peanut butter for a few seconds and then had a melty yummy treat with my orange slices. You won't find me eating chocolate much, but it sure sounded like a good idea, and was! We were reminded that we didn't have an emergency heat source or way to cook in case the power stayed out, so now we are planning  for that, but luckily it's been rather nice, and we had plenty of easy to prep food that needs no cooking. Something to think about....

Sunday, February 5, 2012

Easy Valentine Chocolate Boxes and Dessert Cups

 Above is a little preview of what's to come. These may look rather difficult, but they are so fun that you might find yourself coming up with all sorts of ways to use chocolate.
 First you need to find your mold. They must be somewhat flexible as these pans are, without being squishy. Oil them very lightly and wipe to make sure there's no excess otherwise the chocolate slides back down the sides.
 Melt in a double boiler over low heat 1 bag of semi-sweet and 1 of milk chocolate chips with 2 tablespoons of shortening.
 Once melted take a spoon or somewhat stiff rubber spatula and spread the chocolate around your molds, covering all the inside surface. Don't worry if it doesn't seem thick enough at this point.
 See? Chill this in refrigerator.
 Now take a piece of paper and trace the bottom of your mold. If you trace the top, the lid to the box may be too big.

 With a pen or marker make curliques all over the design, trying to have an even look on both sides, which forgive me but this one is a hurried example as time was of the essence.
 Spoon into a squeeze bottle some of your melted chocolate and add more chips if necessary. This means you should probably buy 3 bags...lol. Keep your bottle in a cup of very hot water to keep the chocolate squeezeable.
 Lay a piece of wax paper down on the design sheet and tape to table or counter.
 Now cover your design with chocolate piping, going double over the outside lines and inside if necessary. Let harden.
 Add more of the chocolate in the double boiler to the sides and bottom of your box as needed for strength. At this point you can put this in the freezer to make this easy to pop out. Take the pan out of the freezer and gently flex it to loosen the chocolate from the sides. Turn over and it should pop out easily. Be careful as the chocolate will melt in your hands so handle lightly. Peel the top of the box off the wax paper gentley and ......
TaaDaa! Now you can fill it with any treat your sweetheart desires. So 3 bags of chocolate chips, some shortening and filler treats to put in your box are all you need. Oh, the photo at the top of this post? I thought I had a post on that! Well, now I need to find a chocolate mousse recipe to share for that which will be forth coming.  Happy Valentines Day!

Monday, January 2, 2012

Pretty in Pink & Chocolate Hues in a Valentines Necklace

Lovely shades of smokey pink, with a drop of chocolate to mix things up are combined to create this lovely necklace. A tiny copper heart charm adds a spark of romance to this one of a kind creation. Say "I love you" with a hand crafted one of a kind necklace from Simply Sheryl's at esty